반응형
윈도우를 설치한 후 시스템을 안전하게 유지하려면 시스템 복원을 활성화하는 것이 중요합니다. 시스템 복원 기능을 사용하면 문제가 발생했을 때 이전 상태로 되돌릴 수 있어 시스템 유지 관리에 큰 도움이 됩니다. 이번 글에서는 unattend.xml 파일을 이용하여 윈도우 11 및 10 설치 시 자동으로 시스템 복원을 활성화하는 방법을 소개합니다.
시스템 복원이란?
시스템 복원은 윈도우에서 제공하는 기능으로, 중요한 시스템 파일과 설정을 백업하여 문제가 발생했을 때 이전 상태로 복구할 수 있도록 합니다. 예를 들어, 드라이버 충돌이나 소프트웨어 오류가 발생했을 때 복원 지점을 이용해 정상적인 상태로 되돌릴 수 있습니다.
시스템 복원 자동 활성화 설정
윈도우 설치 과정에서 시스템 복원을 자동으로 활성화하려면 unattend.xml 파일을 구성해야 합니다. 해당 파일에 아래와 같이 설정하면 됩니다.
unattend.xml 설정 코드
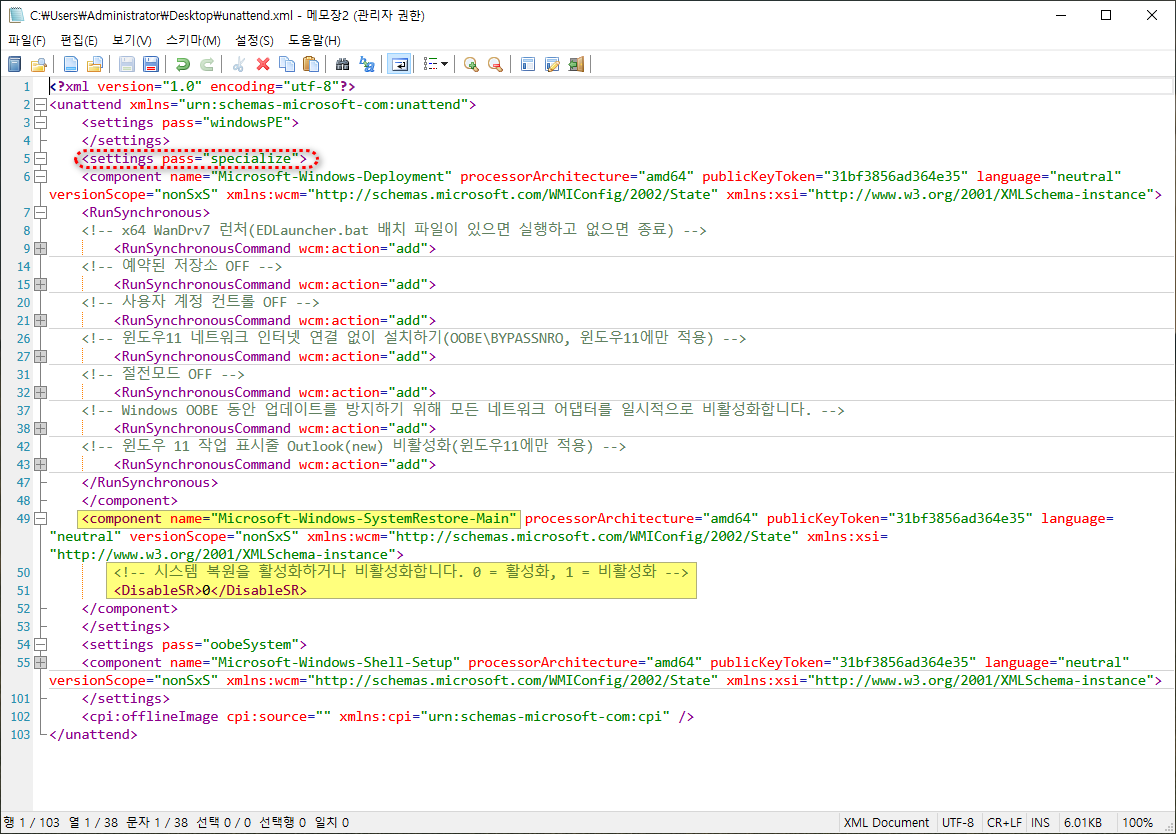
    <settings pass="specialize">
	<component name="Microsoft-Windows-SystemRestore-Main" processorArchitecture="amd64" publicKeyToken="31bf3856ad364e35" language="neutral" versionScope="nonSxS" xmlns:wcm="http://schemas.microsoft.com/WMIConfig/2002/State" xmlns:xsi="http://www.w3.org/2001/XMLSchema-instance">
		<!-- 시스템 복원을 활성화하거나 비활성화합니다. 0 = 활성화, 1 = 비활성화 -->
		<DisableSR>0</DisableSR>
	</component>
    </settings>
위 설정에서 <DisableSR>0</DisableSR> 값을 적용하면 시스템 복원이 자동으로 활성화됩니다.
<?xml version="1.0" encoding="utf-8"?>
<unattend xmlns="urn:schemas-microsoft-com:unattend">
    <settings pass="windowsPE">
    </settings>
    <settings pass="specialize">
	<component name="Microsoft-Windows-Deployment" processorArchitecture="amd64" publicKeyToken="31bf3856ad364e35" language="neutral" versionScope="nonSxS" xmlns:wcm="http://schemas.microsoft.com/WMIConfig/2002/State" xmlns:xsi="http://www.w3.org/2001/XMLSchema-instance">
	<RunSynchronous>
	<!-- x64 WanDrv7 런처(EDLauncher.bat 배치 파일이 있으면 실행하고 없으면 종료) -->
		<RunSynchronousCommand wcm:action="add">
			<Order>1</Order>
			<Path>cmd.exe /c if exist "%Windir%\Setup\Scripts\EDLauncher.bat" "%Windir%\Setup\Scripts\EDLauncher.bat"</Path>
			<Description>Auto Driver Launcher</Description>
		</RunSynchronousCommand>
	<!-- 예약된 저장소 OFF -->
		<RunSynchronousCommand wcm:action="add">
			<Order>2</Order>
			<Path>cmd /c reg add HKLM\Software\Microsoft\Windows\CurrentVersion\ReserveManager /v ShippedWithReserves /t reg_dword  /d 0 /f</Path>
			<Description>Remove Reserved Storagespace</Description>
		</RunSynchronousCommand>
	<!-- 사용자 계정 컨트롤 OFF -->
		<RunSynchronousCommand wcm:action="add">
			<Order>3</Order>
			<Path>cmd /c reg ADD HKLM\SOFTWARE\Microsoft\Windows\CurrentVersion\Policies\System /v EnableLUA /t REG_DWORD /d 0 /f</Path>
			<Description>DisableLUA</Description>
		</RunSynchronousCommand>
	<!-- 윈도우11 네트워크 인터넷 연결 없이 설치하기(OOBE\BYPASSNRO, 윈도우11에만 적용) -->
		<RunSynchronousCommand wcm:action="add">
			<Order>4</Order>
			<Path>cmd /c for /f "tokens=3 delims=.]" %a in ('ver') do if %a geq 21996 (reg add "HKLM\SOFTWARE\Microsoft\Windows\CurrentVersion\OOBE" /v BypassNRO /t REG_DWORD /d 1 /f)</Path>
		</RunSynchronousCommand>
	<!-- 절전모드 OFF -->
		<RunSynchronousCommand wcm:action="add">
			<Order>5</Order>
			<Path>cmd /c powercfg -h off</Path>
			<Description>Powercfg Hybernate Off</Description>
		</RunSynchronousCommand>
	<!-- Windows OOBE 동안 업데이트를 방지하기 위해 모든 네트워크 어댑터를 일시적으로 비활성화합니다. -->
		<RunSynchronousCommand wcm:action="add">
			<Order>6</Order>
			<Path>powershell.exe -NoProfile -WindowStyle Hidden -ExecutionPolicy Bypass -Command "Get-NetAdapter | Disable-NetAdapter -Confirm:$false"</Path>
		</RunSynchronousCommand>
	<!-- 윈도우 11 작업 표시줄 Outlook(new) 비활성화(윈도우11에만 적용) -->
		<RunSynchronousCommand wcm:action="add">
			<Order>7</Order>
			<Path>cmd /c for /f "tokens=3 delims=.]" %a in ('ver') do if %a geq 21996 (reg add "HKLM\SOFTWARE\Policies\Microsoft\Windows\CloudContent" /v "DisableCloudOptimizedContent" /t REG_DWORD /d "1" /f)</Path>
		</RunSynchronousCommand>
	</RunSynchronous>
	</component>
	<component name="Microsoft-Windows-SystemRestore-Main" processorArchitecture="amd64" publicKeyToken="31bf3856ad364e35" language="neutral" versionScope="nonSxS" xmlns:wcm="http://schemas.microsoft.com/WMIConfig/2002/State" xmlns:xsi="http://www.w3.org/2001/XMLSchema-instance">
		<!-- 시스템 복원을 활성화하거나 비활성화합니다. 0 = 활성화, 1 = 비활성화 -->
		<DisableSR>0</DisableSR>
	</component>
    </settings>
    <settings pass="oobeSystem">
	<component name="Microsoft-Windows-Shell-Setup" processorArchitecture="amd64" publicKeyToken="31bf3856ad364e35" language="neutral" versionScope="nonSxS" xmlns:wcm="http://schemas.microsoft.com/WMIConfig/2002/State" xmlns:xsi="http://www.w3.org/2001/XMLSchema-instance">
	<!-- OOBE 무인 설정(자동화) -->
	<OOBE>
        <!-- Windows 시작의 Microsoft 소프트웨어 사용 조건 페이지를 숨길지 여부를 지정합니다. true=숨김 -->
        <HideEULAPage>true</HideEULAPage>
        <!-- OOBE 중에 OEM 등록 페이지가 표시되는지 여부를 지정합니다. true=숨김 -->
        <HideOEMRegistrationScreen>true</HideOEMRegistrationScreen>
        <!-- 사용자가 OOBE 중에 로그인해야 하는지 여부를 지정합니다. true=숨김 -->
        <HideOnlineAccountScreens>true</HideOnlineAccountScreens>
        <!-- Windows 시작 중에 나타나는 무선 네트워크 연결 화면을 숨길지 여부를 지정합니다. true=숨김 -->
        <HideWirelessSetupInOOBE>true</HideWirelessSetupInOOBE>
        <!-- 사용자가 처음 로그온할 때 컴퓨터가 네트워크에 연결된 경우 네트워크의 위치를 지정합니다. -->
        <NetworkLocation>Work</NetworkLocation>
        <!-- 보안 업데이트와 사용자 계정 컨트롤을 모두 활성화. -->
        <ProtectYourPC>3</ProtectYourPC>
        <SkipMachineOOBE>true</SkipMachineOOBE>
        <SkipUserOOBE>true</SkipUserOOBE>
	</OOBE>
	<!-- 관리자(Administrator) 계정으로 자동 로그인 -->
	<AutoLogon>
		<Enabled>true</Enabled>
		<LogonCount>1</LogonCount>
		<Username>Administrator</Username>
	</AutoLogon>
	<!-- 사용자가 컴퓨터에 처음으로 로그온할 때 실행할 명령을 지정합니다. -->
	<FirstLogonCommands>
	<!-- 모든 계정 암호 만료기간 제한 없음 -->
		<SynchronousCommand wcm:action="add">
			<RequiresUserInput>false</RequiresUserInput>
			<Order>1</Order>
			<Description>UserAccount</Description>
			<CommandLine>cmd /c wmic UserAccount set PasswordExpires=False</CommandLine>
		</SynchronousCommand>
	<!-- OOBE 완료 후 네트워크 어댑터를 활성화합니다. -->
		<SynchronousCommand wcm:action="add">
			<Order>2</Order>
			<CommandLine>powershell.exe -NoProfile -WindowStyle Hidden -ExecutionPolicy Bypass -Command "Get-NetAdapter | Enable-NetAdapter -Confirm:$false"</CommandLine>
		</SynchronousCommand>
	</FirstLogonCommands>
	<!-- 해상도 설정 -->
	<Display>
		<HorizontalResolution>1024</HorizontalResolution>
		<VerticalResolution>768</VerticalResolution>
		<ColorDepth>32</ColorDepth>
	</Display>
	</component>
    </settings>
    <cpi:offlineImage cpi:source="" xmlns:cpi="urn:schemas-microsoft-com:cpi" />
</unattend>
적용 방법
- unattend.xml 파일 수정
- 기존의 unattend.xml 파일을 편집하여 위의 코드를 추가합니다.
- Windows 설치 미디어에 포함
- 수정한 unattend.xml 파일을 sources\$OEM$\$1\Windows\Panther 경로에 배치하면 자동 응답 파일로 적용됩니다.
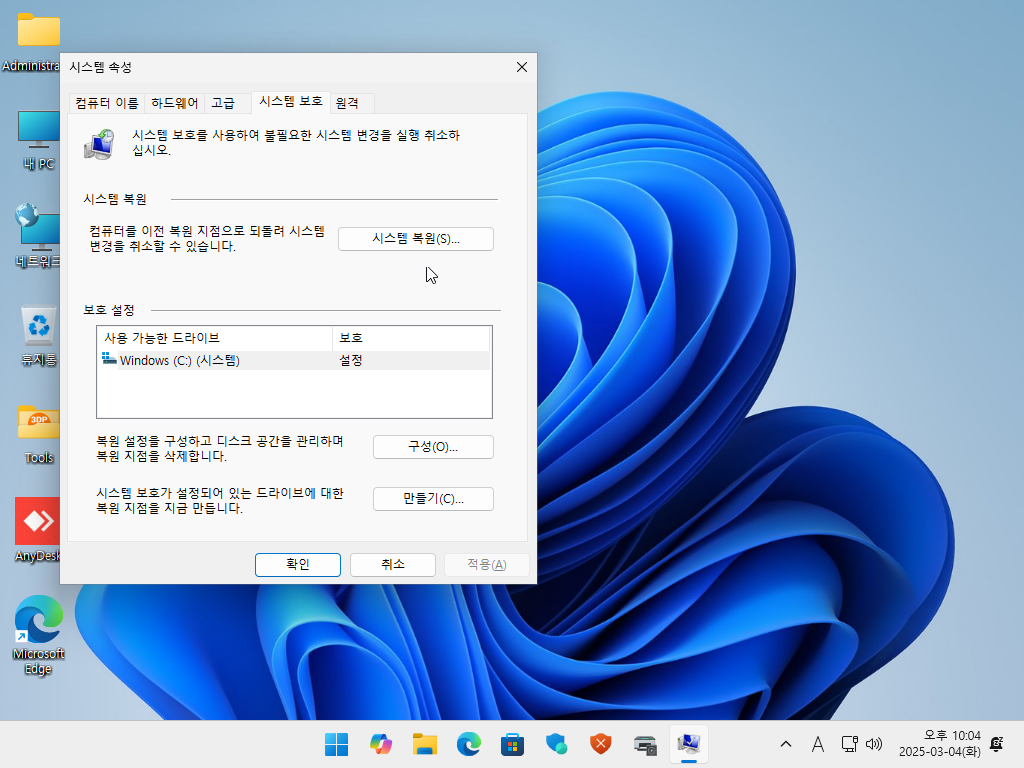
- 설치 진행 후 확인
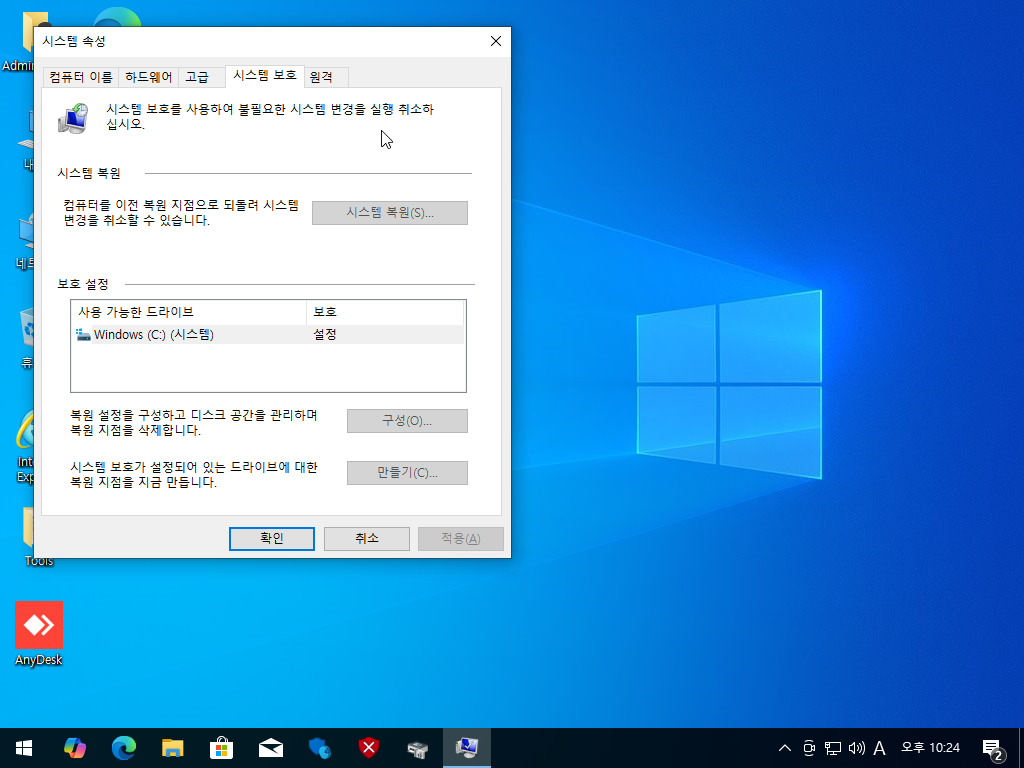
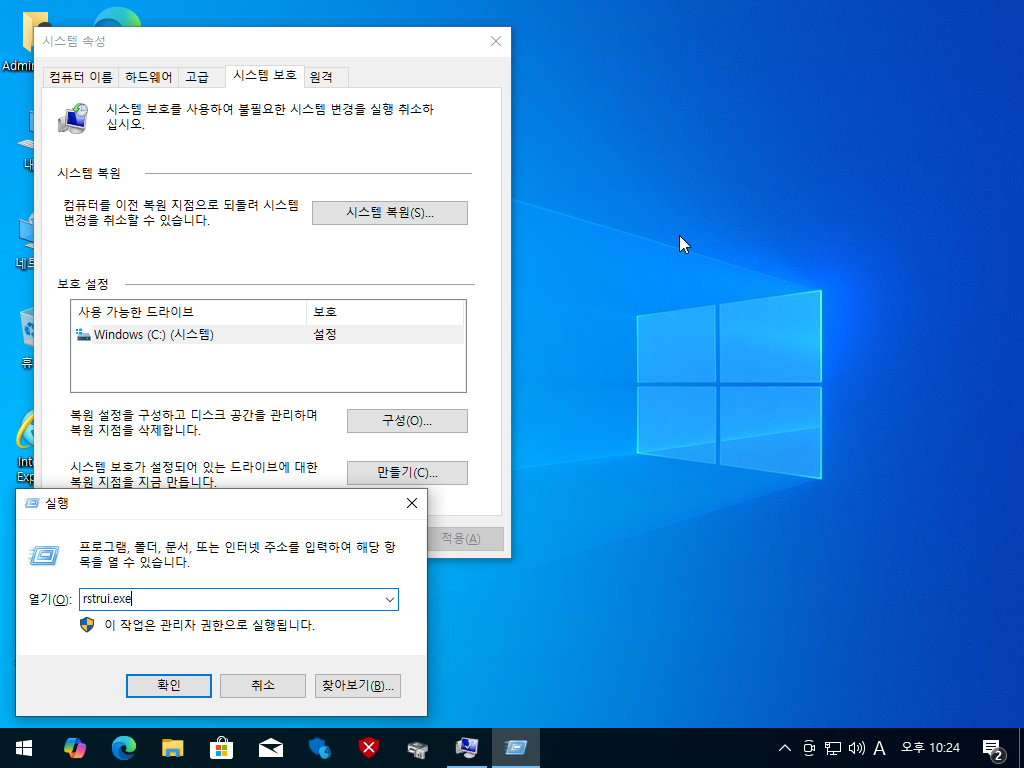
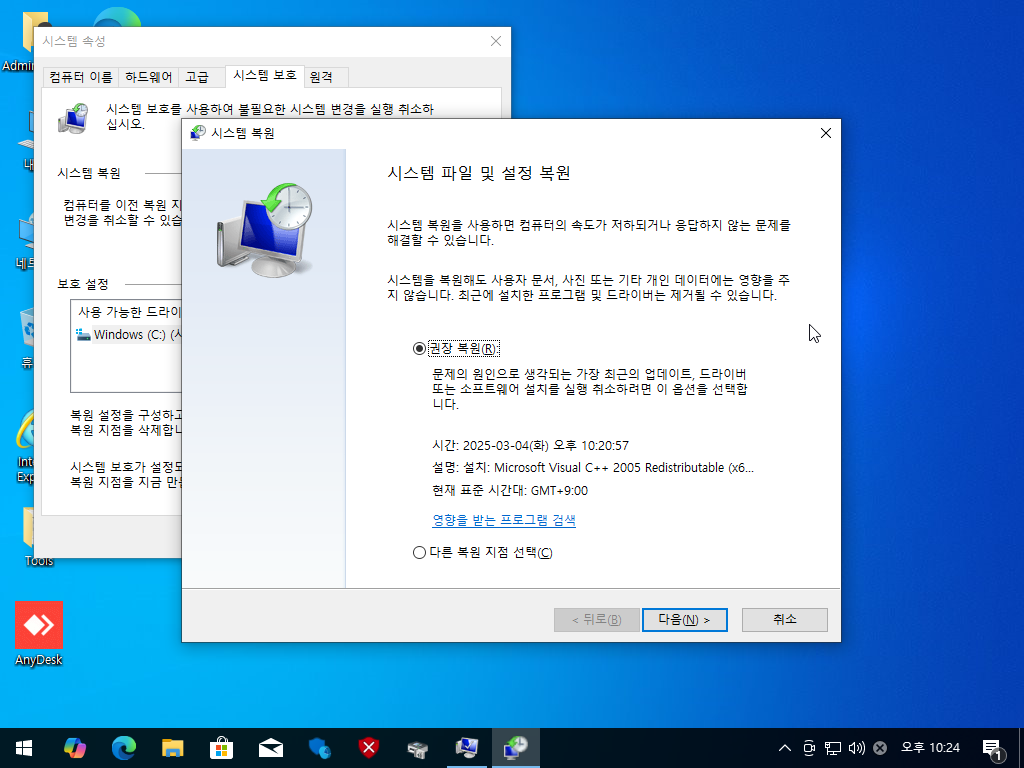
- 윈도우 설치 후 sysdm.cpl을 실행하고 "시스템 보호" 탭에서 복원이 활성화되었는지 확인합니다.
결론
이 방법을 사용하면 윈도우 설치 시 별도의 수동 설정 없이 자동으로 시스템 복원을 활성화할 수 있습니다. 특히 여러 대의 PC를 설치할 경우 시간을 절약할 수 있으며, 시스템 문제 발생 시 빠르게 복구할 수 있어 매우 유용합니다.
윈도우 설치 후 시스템 안정성을 유지하려면 반드시 시스템 복원을 활성화하는 것이 좋습니다. 위 방법을 활용하여 보다 안전한 환경을 구축해 보세요!


윈도우11 시스템 복원 활성화 설치 - 움짤 GIF

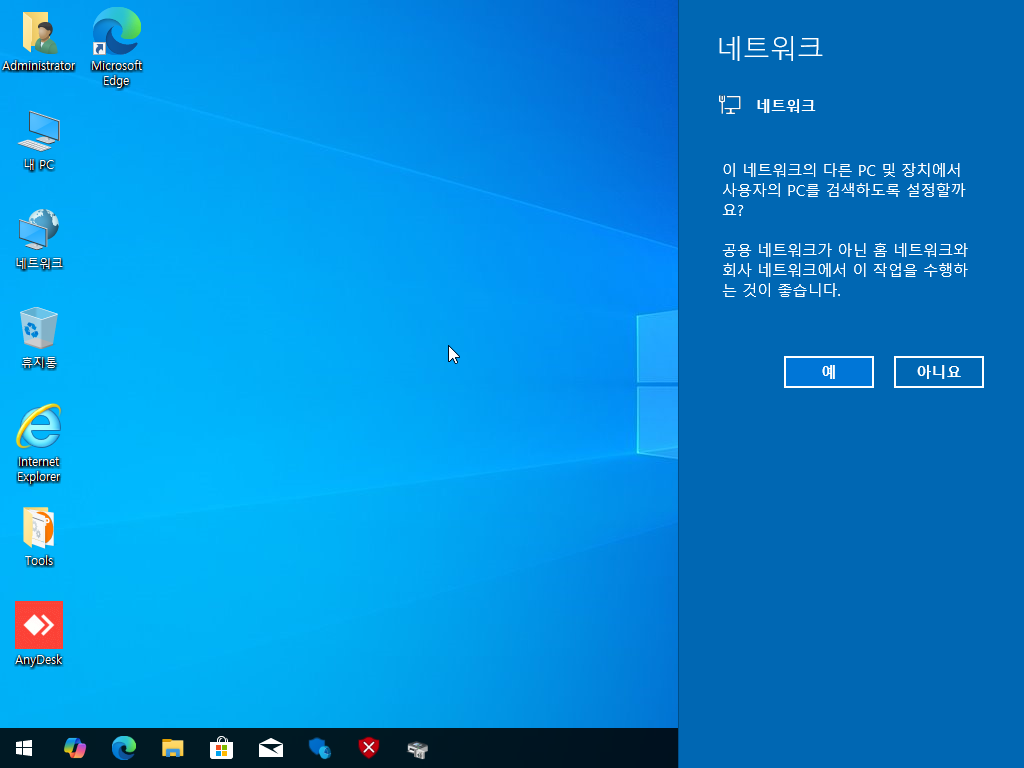


윈도우10 시스템 복원 활성화 설치 - 움짤 GIF

반응형
'무인설치 응답파일(unattend.xml)' 카테고리의 다른 글
| 윈도우 무인 설치(unattend.xml) 응답 파일 설정 가이드 (6) | 2025.03.18 |
|---|---|
| 윈도우 11, 10 설치 시 원격 데스크톱 활성화 하기 (0) | 2025.03.04 |
| 윈도우 11 인터넷 연결 없이 설치하기 (0) | 2025.03.03 |
| [EN] Windows 11 24H2 Previous Version Setup autounattend.xml (0) | 2025.03.02 |
| [2025/종합] 윈도우 11, 윈도우 10 - 무인설치 응답파일(unattend.xml) (0) | 2025.03.01 |